Eggplant and Sausage Panzerotti

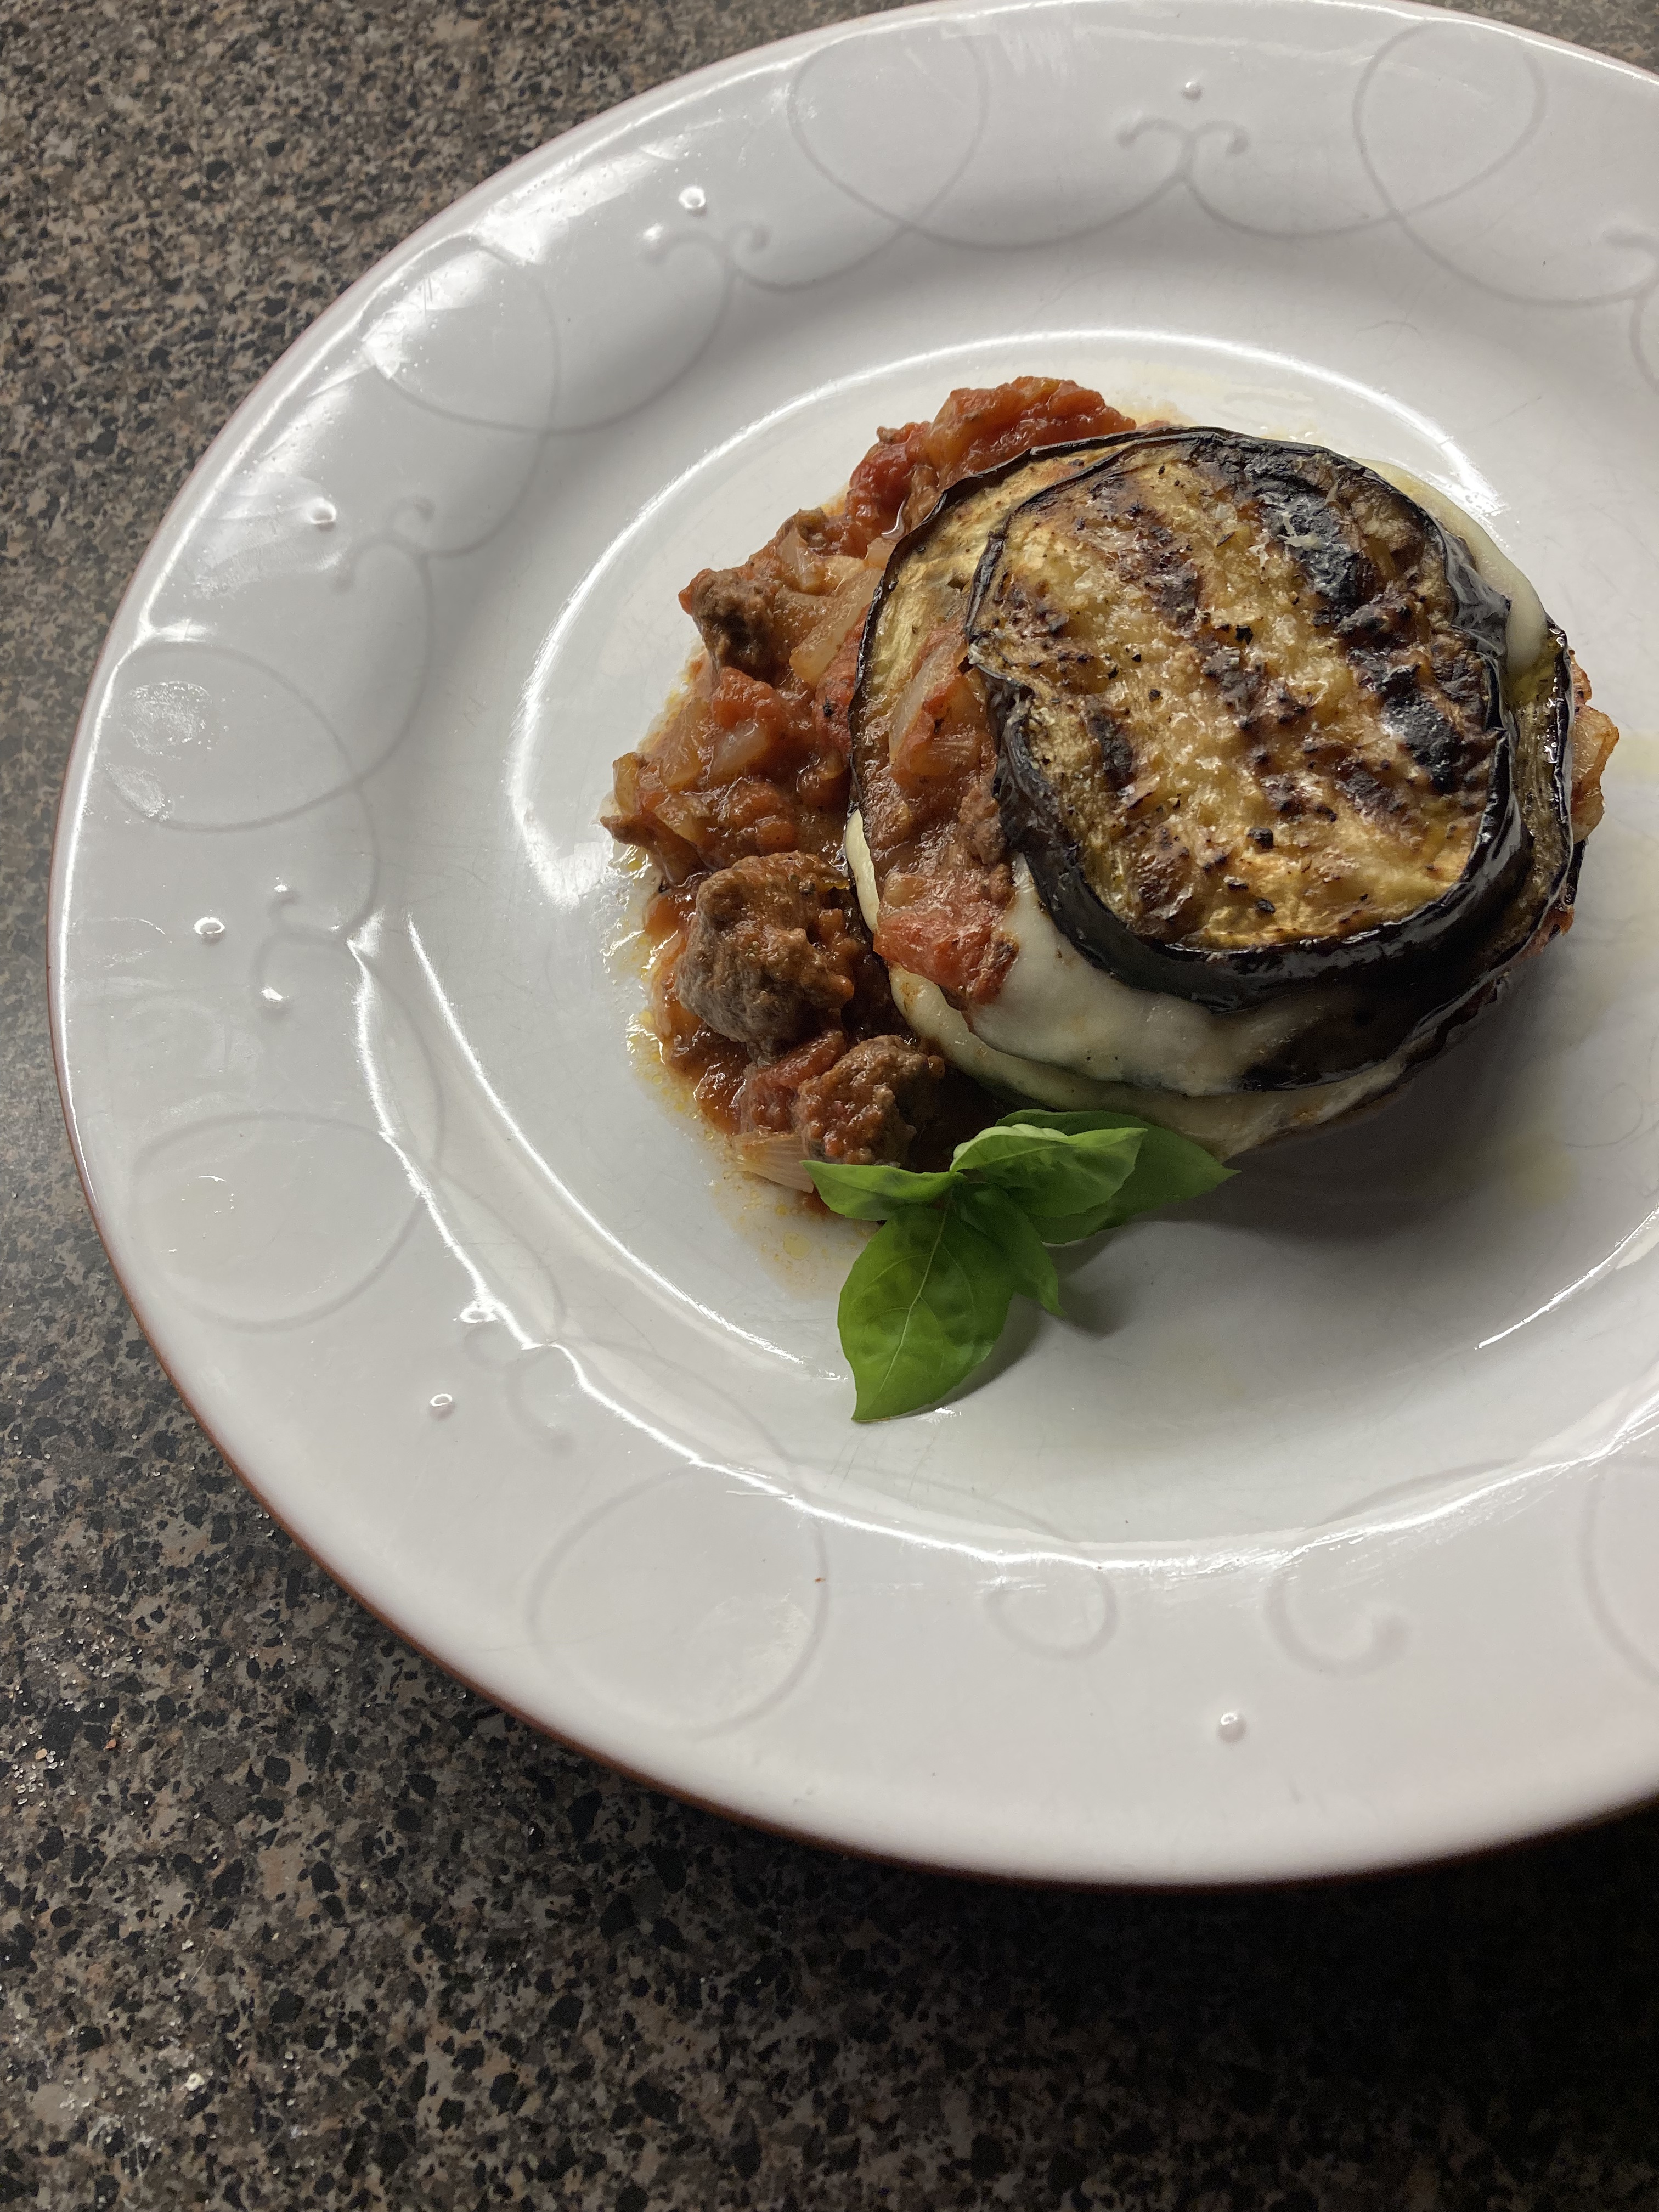
HOW TO MAKE EGGPLANT AND SAUSAGE PANZEROTTI

I give this recipe weekend status not because it’s terribly time-intensive. But simply because anything involving dough or pastry usually involves more time than we can give mid-week.

Weekday or weekend, I still recommend purchasing a good-quality prepared pizza dough from your local market. I say this not because you can’t make a fantastic dough on your own (and you can!) but because it adds unnecessary time. Good quality pizza dough can be found easily. No need to take time proofing your own dough – unless, of course, you’d like to!

You’ll need to pull out your prepared dough from the fridge about 20 minutes before using it in order to bring it to room temperature and to make it pliable.

HERE’S WHAT YOU’LL NEED:

Servings: 2 (assuming 2 panzerotti per person)

1 250g pizza dough (store bought), at room temperature

1 eggplant, diced into 1.5” pieces

5-6 cloves garlic

2 T olive oil

½ teaspoon dried oregano

salt & pepper

¾ cup (200g) pizza mozzarella, shredded (or fresh mozzarella, cubed)

2 Italian sausages, casings removed, and cut into 1” balls

1-1.5 cups marinara sauce

olive oil for brushing

white flour for dusting the dough

HERE’S HOW TO MAKE EGGPLANT SAUSAGE PANZEROTTI:

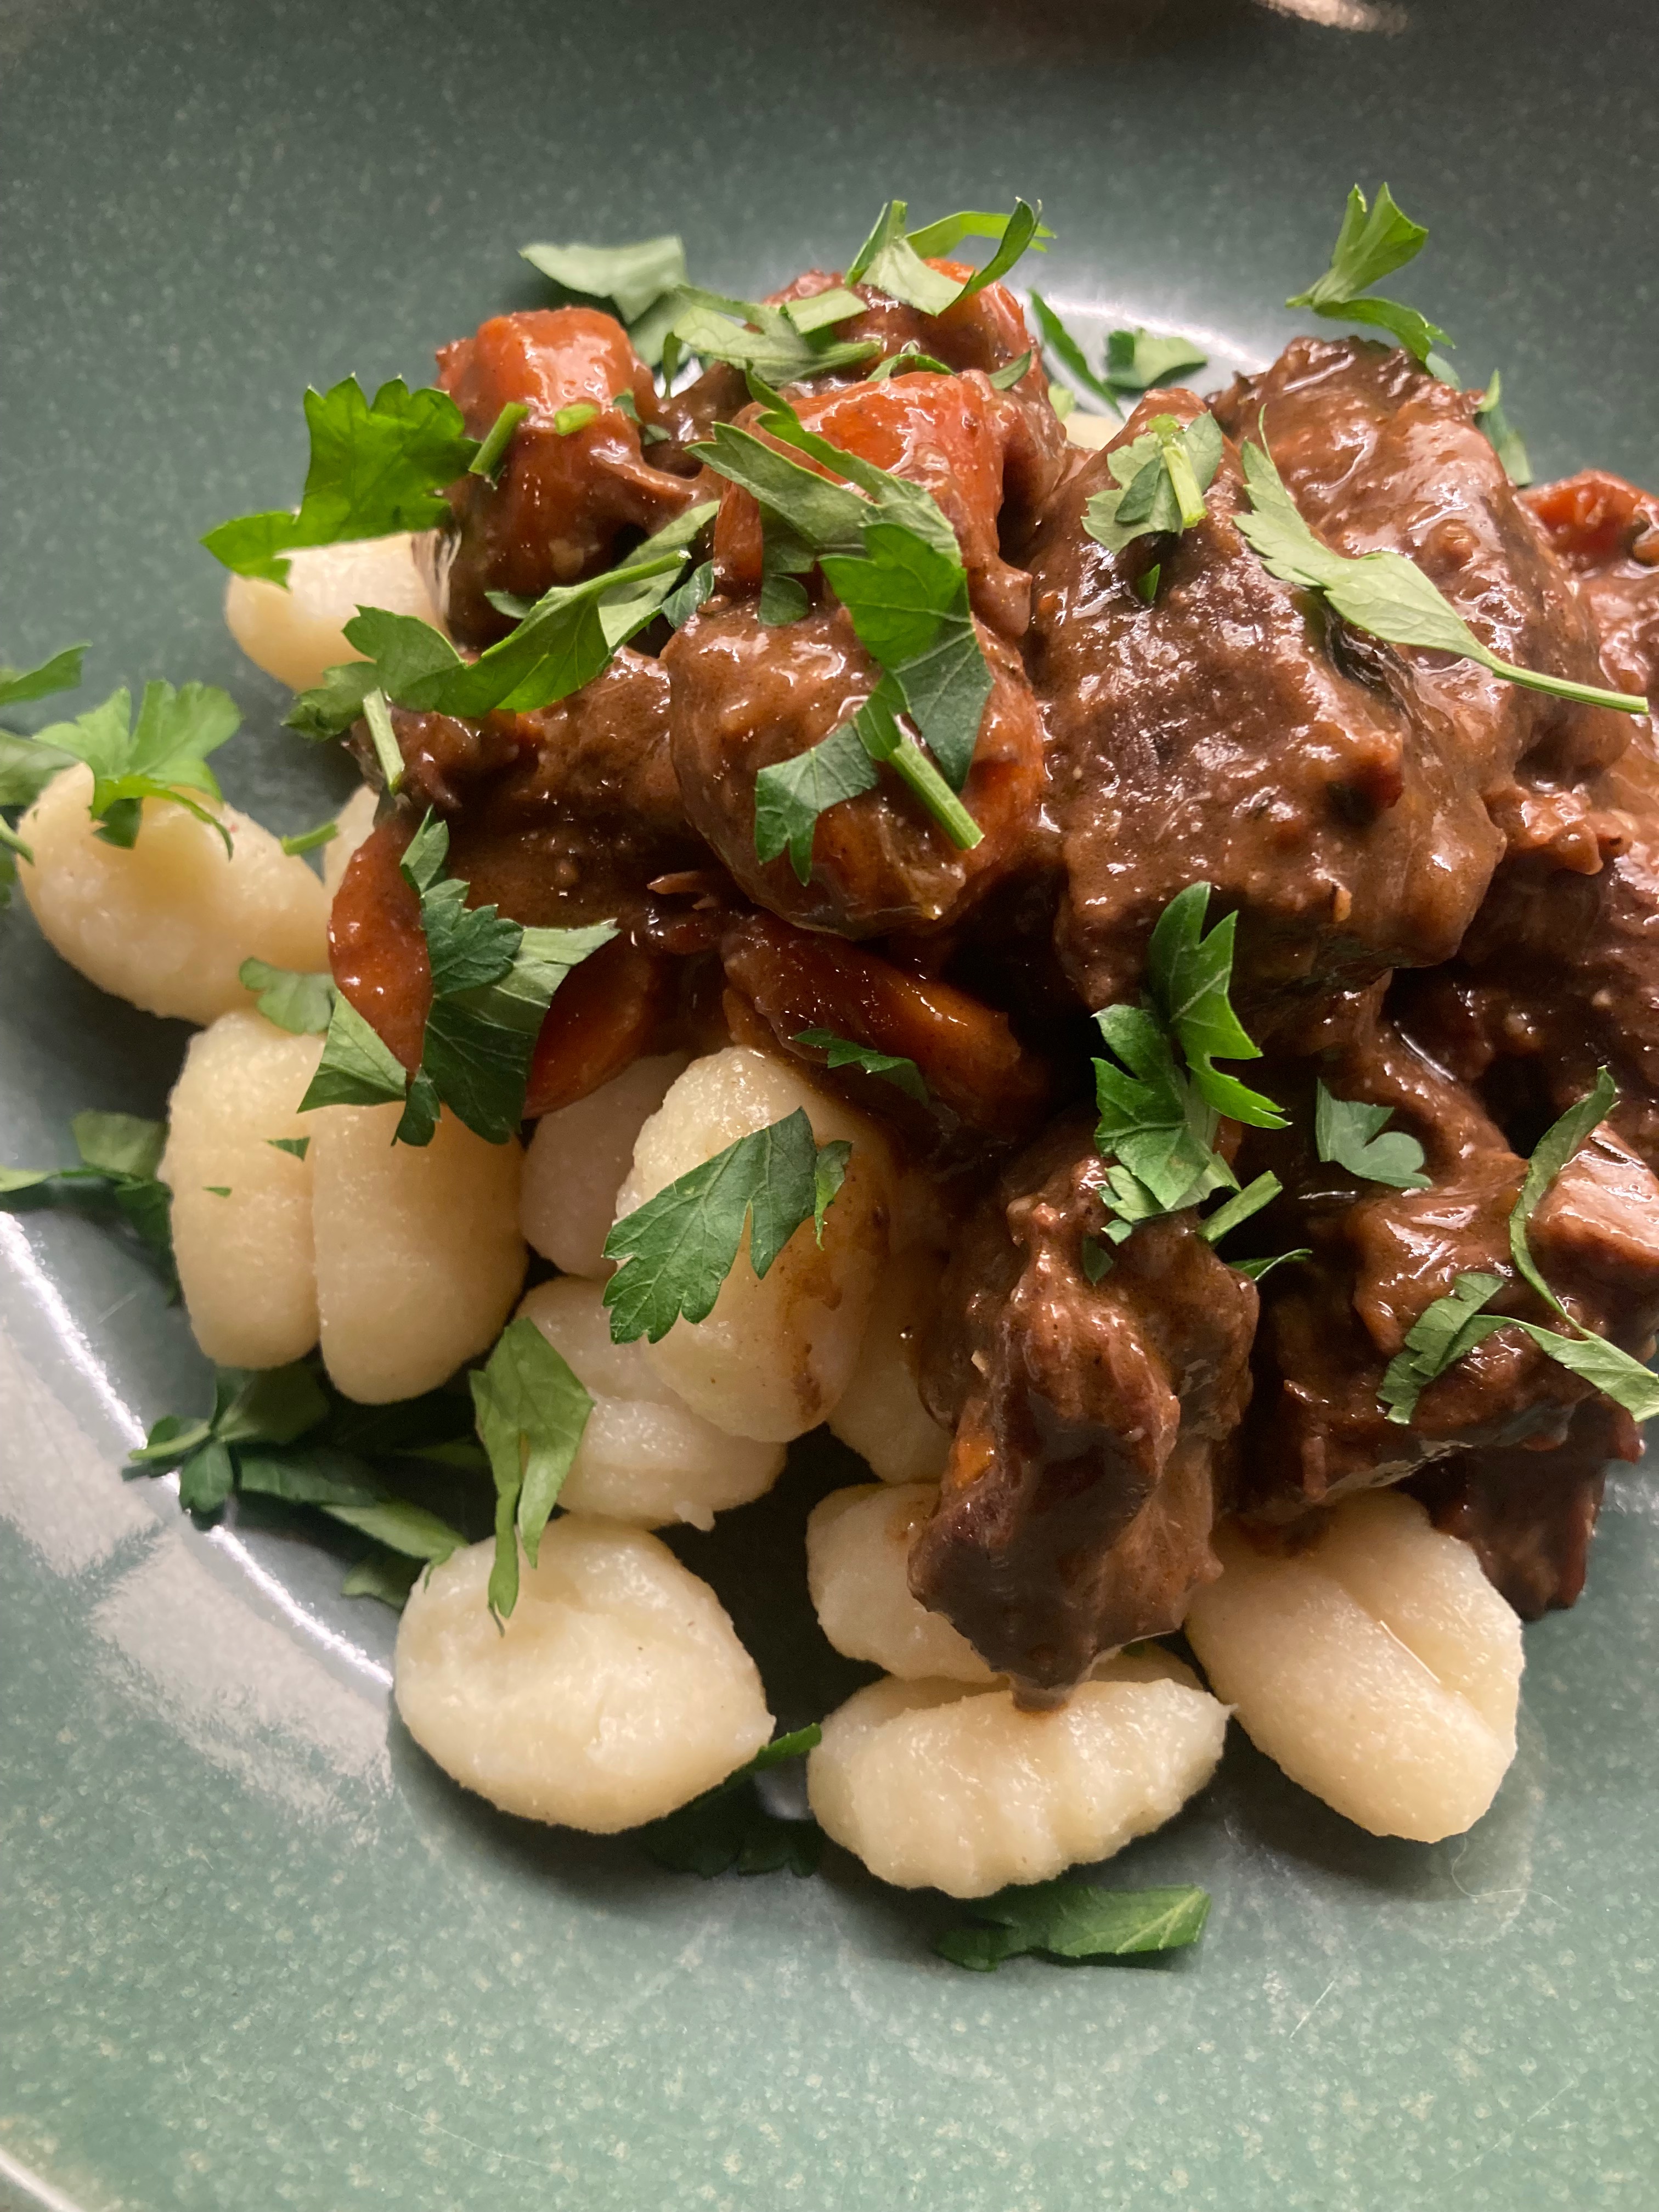
Prep your marinara: If you’re making your own marinara sauce, do this first. If you’re using my marinara sauce recipe, simply swap out the ground beef for the two Italian sausages. Remove casings on the sausages, break the meat down into 1” bits, sauté them, and then proceed with the marinara recipe (see my Eggplant Parmesan recipe). If you’re using jarred marinara sauce, simply sauté the sausage bits for about 3-4 minutes, then add about a cup and a half of jarred sauce to warm it.

Prep the eggplant for roasting: Cut the eggplant into 1.5” cubes. In a large roasting pan, toss the eggplant with garlic cloves, olive oil, oregano, and season well. Roast for about 30 minutes in the oven at 400˚F.

Combine the Eggplant and Marinara: When the eggplant has finished roasting, combine it with the sausage and marinara sauce.

Roll out your dough: Assuming your dough has been out of the fridge for about 20 minutes, cut it into quarters. Take each quarter and roll it into a ball, then work each quarter into a small circle, about 5” in diameter. Use flour to dust the dough to make it pliable and less sticky. Roll it out to about ¼” inch thick.

Fill the dough: Take each circle of dough and fill the right half with a scoop of eggplant/sausage mixture, top it with about a tablespoon of shredded cheese, and then seal the envelope of dough by turning the left side over to the right side to create a crescent shape. Seal the edges by pinching them and using a little water to seal any gaps.

Bake for about 14 minutes at 400F: Bake until the dough looks golden brown, about 14 minutes. Remember, both your eggplant and your marinara are cooked. The baking process in simply to melt the cheese, combine flavors, and bake the dough. Serve a panzerotto or two to each person.

TIPS AND TROUBLESHOOTING:

Be careful with liquid amounts in the filling: I use a slotted spoon when adding the eggplant/sausage/marinara mixture to the dough in order to control the liquid (i.e. the marinara). If you add too much sauce, this can break the seal of your pastry when baking. While liquid leaking from your pastry doesn’t affect flavor, it affects appearance – so…if you’re entertaining and making lots of these, you’ll want to be a bit careful!

Seared Pork Tenderloin with Cauliflower (A.K.A. Battle: Garlic Powder)

How to Make Seared Pork Tenderloin with Cauliflower

I’m instinctively an advocate for the unsung hero. And in this case, it’s two-fold: pork and garlic powder.

Pork seems to be the bastard child of white meats in the cooking world, and I’ve never understood why. Chicken is commonly heralded as the white meat of choice, the most versatile, the most affordable (which is highly questionable these days). And turkey holds the limelight on major holidays like Thanksgiving and Christmas.

But what about pork? In my mind, pork needs a brand re-boot as an enviable alternative to both chicken and turkey.

And as for garlic powder…

Being the know-it-all in the kitchen that I am, I often defy listening to my mother. And when it comes to garlic, and more specifically, garlic powder, I have taken issue in the past with guess who. I’ve caught my Mom using garlic powder in a number of recipes and attempted to apprehend her: “Garlic powder?!” (me, in an elevated voice). I mean, really. It’s a supreme sacrilege for any cook (outside of a dry rub).

Or is it? Well, I’ve since found one undeniably good use for garlic powder – and it’s cauliflower. Pan-fried until golden brown, then adding a sprinkling of – dare I say it, garlic powder – with a tab of butter at the end. The result is quite sublime (if you can believe it). I would even go so far as to say it beats the real deal – the clove.

I’ve paired this unorthodox side-dish with pork tenderloin because it just seems to fit – two unsung heroes meet to align and reign. Especially in warmer months when you want to bypass mashed potatoes (That said, I would suggest a side of potato and celeriac mash for this recipe when the season calls). So… perhaps this recipe is part-advocacy and part-reparation for anyone who has dared to challenge her own Mom, inside or outside the kitchen. It’s a way of graciously saying: “*Maybe* you were right.” (Admission can be tough, I know.)

Here’s What You’ll Need for the Pork Tenderloin:

Serves 3-4

  • 1 ½ lb. pork tenderloin
  • 1 T olive oil
  • 1 T butter
  • 3 T grainy mustard
  • 2 T molasses
  • 1 medium onion, chopped (or 3 shallots, sliced)
  • About a ½ cup white wine
  • 1/2 cup water or chicken stock

Here’s What You’ll Need for the Cauliflower:

  • A head of cauliflower, chopped into medium-sized florets
  • About a cup of water
  • 1-2 T olive oil
  • 1 teaspoon garlic powder (you heard me)
  • 2 T of butter

Here’s How to Make Pork Tenderloin:

Preheat the oven to 400˚.

In a Large Skillet: Season the pork well. Add olive oil and butter to a hot pan. When hot (very hot) and ready, add your pork, and with tongs, sear all sides – about 2 minutes per side, turning to make sure each of the four sides is browned.

Transfer to the Oven: Just before transferring the pork to the oven, add the onions (or shallots), white wine and water (or chicken stock) to the skillet. Mix the glaze of grainy mustard and molasses and coat the top and sides of the pork with the glaze. Put into the oven, uncovered, for about 16-18 minutes (until desired temperature (150˚-ish = slightly pink).

Let it Rest: For about 10 minutes, uninterrupted.

Here’s How to Make the Seared Cauliflower:

Cut the Cauliflower into Florets: Cut the cauliflower into medium sized florets. Place them in a deep skillet and add the water. Bring to a slight boil over medium-high heat. Cover and simmer over a medium-low heat for about 3 minutes. Check to see if they are tender crisp.

Allow the Water to Absorb: This is almost the equivalent of an absorption method in rice. Allow the water to absorb. If you find that the cauliflower is done to desired tender crisp, but there is still water in the pan, just drain it carefully. Then add the olive oil to the same skillet and move the florets around, allowing them to slightly brown over a higher heat. Then add the garlic powder, and butter. Toss them to incorporate and season well.

Tips & Troubleshooting:

For the Pork: If you don’t have molasses, you can use maple syrup. If you’re feeling herbal, you might also add a sprig of thyme. Also, gone are the days when we can’t have slightly pink pork. It depends on your taste, of course, but do not overcook it because you think it needs to be grey. It doesn’t. Lastly, if you find the liquid has all but absorbed by the time you take the pork out of the oven, and the pork is done, set the pork aside to rest and add a bit of chicken stock or water (or wine) to the pan to create a jus.This just means placing the pan back on a burner on a medium to high heat for a minute or so to reconstitute the onions in the pan and to create a kind of gravy.

For the Cauliflower: Don’t overcook it! Check to see if it’s tender crisp and drain any excess water before pan-frying. Overcooked cauliflower is not a good outfit. I say “3 minutes” here because I cut my florets pretty large. If you like to cut smaller, adjust the steaming time.

Serve up and enjoy!

QUICK PUMPKIN BREAD

HOW TO MAKE QUICK PUMPKIN BREAD

This recipe might seem unseasonal in May. After all, we’re heading into Summer with inspired notes of lemon, fresh basil, tarragon, asparagus, and summer peas and squash. So who cares about a pumpkin recipe? I do – and here’s why you might, too. Pumpkin bread is tasty any day, in any season. It’s for those slightly chilly and rainy Spring days when you crave a note of warmth that can only come from a baked treat with a hint of cinnamon. Or maybe it’s a day when no one seems to be listening to you and you need a warm hug? Snuggle up! Especially if it’s a Sunday and you can peruse a new series or film on Netflix with a cup of tea and some pumpkin bread. Relax and enjoy. Plus you can gift a few slices to deserving friends or neighbors. Trust me, they will appreciate a lovely baked sweet bread. YUM.

Ready to make Quick Pumpkin Bread?

Here’s what you’ll need:

  • 1 stick (1/2 cup) unsalted butter, at room temperature
  • ¾ cup of sugar, packed (preferably, demerara)
  • 1 cup canned pure pumpkin
  • 2 eggs, beaten
  • 1 ½ cups flour
  • 1 teaspoon baking soda
  • ½ teaspoon salt
  • 1 ½ teaspoons cinnamon
  • ¼ teaspoon ground allspice
  • scant ¼ teaspoon ground ginger
  • scant ¼ teaspoon ground nutmeg (or slightly less if freshly grated)
  • ½-1 teaspoon pure vanilla extract
  • 3 T (generous) plain yogurt

Here’s how to make Quick Pumpkin Bread:

Preheat Oven to 350˚: Grease and lightly flour a loaf pan.

In a mixing bowl: Cream the room-temperature butter with the demerara sugar with a hand-mixer or stand-mixer. Add the pumpkin and the beaten eggs.

In a separate small bowl: Combine your dry ingredients (flour, baking soda, salt and spices).

Add your dry ingredients to the wet: Add the dry-ingredient mixture in 3 parts, somewhat equally, while slowly beating them into the wet ingredients. Do not overmix. Just incorporate.

Add vanilla and yogurt: Add the vanilla and yogurt until just incorporated.

Pour batter into a loaf pan: Pour mixture into a greased and floured loaf pan and bake until a skewer inserted comes out clean – about 50 minutes.

Tips & Troubleshooting:

Butter vs. Oil: Okay, I will admit I’m a butter freak. And can anyone argue against the benefit of butter in baking? That said, if you choose to use oil, that’s okay. The creaming of the butter-to-sugar mixture isn’t really necessary in this case. Simply mix your oil and sugar, then proceed with the rest of the ingredients. I also recommend against seed oils (including canola oil) for health reasons, so try to opt for a mild-flavored olive oil.

Spices: Here again, I tend to be lush. I like a depth of flavor for a pumpkin bread. However, if you want to go with cinnamon only, that’s okay! I only suggest a splash of other spices (ground allspice, ginger, and nutmeg) to add depth of flavor. Perhaps this is more apropos for Fall? You decide!

Why the yogurt? I add plain yogurt as a last step of pretty much all quick breads because it contributes to an unparalleled level of moisture in the finished bread. Is it 100% necessary? No.

EASY BOEUF BOURGUIGNON RECIPE

Here’s how to make Easy Boeuf Bourguignon

I have this love/hate relationship with Boeuf Bourguignon. Probably because I’ve never bought into the fuss with the classic Julia Child / French recipe. It’s a bit “much ado” in my opinion. However, not about nothing. But I think I’ve cracked it – a super tasty recipe, but a lot simpler than the traditional French recipe (or Ms. Child’s). And I’ve even paired it with gnocchi (instead of the traditional mashed potatoes) – sacrilege, I know!

You’ll also notice that I bypass the pearl onions altogether (which are traditional in this recipe) – not worth the time in my opinion.

IF you love mushrooms – make them separately and add them in after. You can also bypass the mushrooms (okay, I know, I’m fired!).

Ready to make Easy Boeuf Bourguignon?

Here’s what you’ll need:

Servings: 4

  • 3 T olive oil
  • 2 slices of good quality smoked bacon, cut into ¼ -inch slices
  • 2 lbs. sirloin tip roast beef, cut into 2-3-inch chunks (or any stewing beef, like chuck)
  • 3 large shallots, sliced (or one medium white onion, diced or chopped)
  • 2 large carrots, sliced into ½-inch slices
  • 3 cloves of garlic
  • 1 T tomato paste
  • 1 T white flour
  • 3 cups red wine (recommend: Pinot Noir)
  • 1 ½ cups beef broth (or warm water mixed with 1 cube of beef bouillon)
  • Spring of fresh thyme
  • Salt & pepper
  • 250 g gnocchi (1 package)
  • Fresh Italian parsley or basil, for garnish
  • Plain yogurt (optional)

For the mushroom folks:

  • 450 g cremini mushrooms, halved or quartered
  • 2 T olive oil
  • 1-2 T butter
  • 2 cloves garlic, crushed
  • Salt & pepper

Here’s how to make Easy Boeuf Bourguignon

Pre-heat your oven to 325F.

Prep your beef. If you’re using a sirloin tip roast that hasn’t yet been cut down, cut it into 2-3” squares. If you’re using pre-prepped stewing beef, it’s good to go. Season the beef.

Heat the Dutch oven: Heat the olive oil a medium-high heat, add the bacon and render it down to release the fats and make it crisp. Remove the bacon rind and set aside. Add the seasoned beef chunks to the same pot and sear on both sides until browned – about 2 minutes per side. Remove the beef from the pot and set aside.

Add your aromatics: Add the sliced shallots to the same pot, move them around for about 1-2 minutes. Add the carrots. Move them around for about a minute. Add the garlic. Add the flour and incorporate it into the onion/carrot/garlic mixture, which will slightly thicken it. Add the red wine and beef stock (or water plus bouillon cube). Allow it to come to a simmer. Add the tomato paste and whisk it in. Then add the beef and bacon back into the pot. The liquid should just cover the beef. Add a sprig of fresh thyme.

Put it into the oven for braising: Cover the pot and put it into the oven on a low heat (325F) for about 2 ½ hours.

In the meantime: If you’d like to add mushrooms to the final dish, cook them separately about a half hour before the end of the beef cooking time: Heat olive oil and butter on a medium high heat. Add garlic and cook for about a minute. Add the mushrooms, season, and keep moving them around until their water is released and they start to settle. (Mushrooms contain a lot of water that gets released in cooking. Just render them out for a couple minutes). Set aside until the beef is done, and then add to the beef before serving.

Serving sides: Mashed potatoes or gnocchi? I quite like gnocchi for this recipe, but, by all means, serve with a mash if you prefer. For the gnocchi, simply cook about 3 minutes according to the package instructions, and serve the boeuf bourguignon on top, with a bit of fresh Italian parsley, or even basil, as garnish.

Tips and Troubleshooting:

Cuts of Beef: I personally prefer sirloin tip because it’s a slightly higher-grade beef than typical chuck roast (or stewing beef). However, both work for this dish. The sirloin tip is slightly less fatty, as it’s cut from the hindquarters unlike chuck beef which is cut from the shoulder. Also, chuck is tougher than sirloin tip, which means you might need to add extra time to the braising to achieve desired tenderness. Sirloin tip gets tender within the 2 ½ hour time-frame prescribed in this recipe.

Bring Me the Bacon: I recommend smoked bacon for this recipe. Just make sure your smoked bacon is not “maple-smoked” as this adds a level of sweetness that I don’t recommend for this dish.

Shallots vs. White Onion: This is a matter of preference. I like shallots for this recipe as they lend a nice balance of sharpness and sweetness. However, white onion works just as well – it’s simply milder in flavor. I’m a firm believer in using what’s at hand, so check your pantry. Don’t go buying shallots if you have a nice white onion, in other words. Not worth the time, effort and extra money.

Which Red Wine Do I Choose? Julia Child recommended a Burgundy wine for this recipe. This basically means a Pinot Noir – ideally from Burgundy, France (as opposed to a California Pinot).  While this is not strict advice to follow, I’ll tell why it’s good advice. French Burgundies are medium-bodied, intensely fragrant wines with a fruity, elegant palate (think: cherries), with highish acidity and low levels of tannins. This wine works well in this recipe to mediate the richness of the sauce. A fuller-bodied red wine, such as a Bordeaux, or an Italian Primitivo, for example, will work, but will yield a very rich sauce due to the added body of the wine. I’ve found this result a bit over the top in richness and suggest adding plain yogurt as a garnish, if you choose such a full-bodied wine (see image below).

COTTAGE CHEESE: DON’T CALL IT A COMEBACK

The Spring 2024 issue of the LCBO’s Food & Drink is out. A banner day for us foodies who anticipate any issue of the mag, but especially the one that signals that Winter is behind us.

The cover image depicts what looks like an elevated avocado toast. Elevated by a supporting appearance by none other than the fluffy, cloud-like edible that has been rocking the internet for the past couple of months: Cottage cheese. In fact, as someone who’s never really taken to the avocado toast fad, this updated version has even me interested.

Why? Well, it’s kind of like this: If you grew up in the 90s and remember buying actual CDs and going to concerts long before your favorite bands were internet sensations, you probably have a story about that one band you were the first to admire – you were their “charter member,” the one who took pride in her own prescience – and wanted everyone, including the band, to know about it.

I feel this way about the current cottage cheese trend. That is, I’ve been appreciating cottage cheese long before TikTok or Gen Z-ers sang its praise. I’ve been applauding its versatility, its low-fat status, its high protein content, its effortless simplicity – for a good decade now. In other words, I was a charter member of the cottage cheese club.

But so was Jamie Oliver.

In fact, I can’t claim foreknowledge of the cottage cheese craze without giving credit to Mr. Oliver, who has been heralding its benefits since at least 2012. As proof, I’ve recorded episodes of his series, 30 Minute Meals, where he provides numerous uses for the humble curds. He also explains why they mysteriously seem to keep making cameos in his half-hour shows, despite his chef-y sensibilities: His wife, “Jools,” had a habit of buying them, and Mr. Oliver felt obligated to find a use for them. The result? A surprisingly high number of tasty applications for cottage cheese.

And so, as an Ode both to the curds and to Mr. Oliver’s charter member status in the cottage cheese fan club, I’d like to share what I believe is his best effort on the curd front: Balsamic Beets with Lemon-scented Cottage Cheese. I can’t say my rendition is exactly Mr. Oliver’s version, but it’s pretty close:

BALSAMIC BEETS WITH LEMON-SCENTED COTTAGE CHEESE

Ingredients:

  • A package of roasted beets (the kind you buy in an airtight package in most grocery stores – usually 4-5 beets in a package)
  • 1 T Balsamic vinegar
  • 2-3 T Olive oil, plus more to dress the cottage cheese
  • About 4 leaves of fresh basil, torn (or chiffonade if you’re fancy)
  • About 1 cup of cottage cheese
  • Zest of 1/2 lemon
  • ¼ teaspoon of fresh thyme, chopped
  • Salt & pepper

Instructions:

In a medium sized bowl, quarter or cube the beets. Dress them with balsamic vinegar and olive oil – about 1 T of vinegar to 2-3 T of olive oil. Season to taste, add the basil and give them a toss.

In a separate small bowl, dress the cottage cheese with a splash of olive oil (about a teaspoon), the lemon zest, the fresh thyme, and season to taste.

To serve, I recommend individually plating one portion of beets, and topping it with a heaping tablespoon of the cottage cheese mixture. This is optional, and a slight deviation from Mr. Oliver’s instructions – he advises a family-style plating. (I think it’s neater to individually plate this recipe.)

I guarantee this recipe will surpize you. It is delightfully fresh, light, and rich in flavor all at the same time.

And so… don’t call it a comeback. Because, for some, like Jamie Oliver and his devoted viewers, like me, cottage cheese never left the spotlight in the first place. Bon appétit!

GRILLED EGGPLANT PARMESAN RECIPE

Grilled eggplant parmesan is next level eggplant parm without the fuss and frying!

DREAMING OF EGGPLANT PARMESAN?

OK, so let’s talk eggplant parm. I remember my grandmother making this classic dish by pan-frying the eggplant in a skillet prior to assembly. WRONG. No offense to my Italian American Nana, but eggplant shouldn’t be fried (and, yes, I feel an evil eye coming my way). For one, frying adds extra fat. And two, it makes your parm extremely heavy. Instead, GRILL the eggplant! Grilling makes for a lighter parm and adds the smokiness of simple indoor grilling – and, yes, indoor grilling adds noticeable smokiness – and takes your parm to the next level.

Think grilling adds extra time to this dish? Think again! Frying usually requires dredging the eggplant in both flour and an egg mixture. Grilling requires nothing more than slicing and seasoning the eggplant. PLUS: by grilling the eggplant, it is essentially cooked by the time you bake it, cutting down on baking time!

I do, however, recommend making your own marinara sauce – and I’ve included that simple recipe here, too.

Ready to make your Grilled Eggplant Parmesan?

HERE’S WHAT YOU’LL NEED:

*this recipe serves 4

  • 2 medium-large sized eggplants (sliced into ½” slices)
  • Salt & pepper
  • Olive oil
  • Marinara sauce
  • 200 g (~1 cup) of fresh mozzarella, or a good quality pizza mozzarella (sliced into ¼” slices)
  • Parmesan cheese, freshly grated
  • Fresh basil, for garnish

For the marinara sauce (if you’re making your own, instructions follow the parm instructions):

  • 3 T olive oil
  • 1 medium onion, diced
  • 2-4 garlic cloves, depending on your taste, crushed, minced, or finely sliced
  • about ¾ lb. ground beef (optional)
  • 796 ml (28 oz.) tinned whole tomatoes (I like Mutti) – or crushed tomatoes or passata if you prefer a smoother sauce
  • about a ¼ cup red wine (or white)
  • 1/4 teaspoon dried oregano (or a small sprig of thyme if you prefer)
  • about 1/4 cup of freshly grated parmesan cheese
  • Salt & pepper

HERE’S HOW TO MAKE NEXT LEVEL GRILLED EGGPLANT PARMESAN

Prep your marinara: If you’re making your own marinara, do this first, and keep it warm (my recipe is below). If you’re using a jarred sauce, have it ready to go by keeping it room-temperature or warm in a separate sauce pot.

Prep your eggplant and the grill: Get your indoor grill hot and ready. I use a 19.5 x 10” grill from LODGE that occupies two burners, vertically. Brush your grill with a bit of olive oil. Slice the eggplant into ½” slices. Season on both sides with salt and pepper.

Grill the eggplant: When the grill pan is hot (medium-high heat), place the eggplant slices onto the grill. Grill for about 3 minutes per side. You should see deep, char grill marks. If you’re using a grill pan like mine, the grill pan should fit one medium sized eggplant, about 11-12 slices. In which case, do the same with the second eggplant – slice, season, and grill, and put aside.

Assemble your parm: In a large baking or casserole dish (at least 14” x 13”), lightly coat the bottom of the dish with olive oil. Then add a thin layer of marinara on the bottom of the dish. Begin layering the first slices of eggplant. On each slice of eggplant, place a bit of marinara, then a slice of mozzarella, then a dusting of parmesan cheese. Repeat with another slice of eggplant, marinara, mozzarella, and parmesan. Then top with a third slice of eggplant. You should have about 8 towers of eggplant consisting of three slices of eggplant in each tower. Cover with a dusting of parmesan.

Bake for about 20 minutes at 400F: Bake until the cheese melts. Remember, both your eggplant and your marinara are cooked. The baking process in simply to melt the cheese and combine all the flavors. Serve a tower (or two) to each person and garnish with fresh basil.

TIPS AND TROUBLESHOOTING:

“My family is full of carnivores”: Mine too! I actually make my marinara as a Bolognese. Instructions are below.

“I don’t have as large an indoor grill”: If your indoor grill pan only accommodates one burner, you’ll have to perform the above grilling in 4 stages, if you’re serving 4 people. The good news is, if you’re cooking for two, you’ll only have to grill in 2 stages, one stage per half eggplant and halve the entire recipe (i.e. one eggplant as opposed to two). Or…invest in a larger grill pan that occupies two burners – this saves a lot of time and has many, many applications – the one I have is reversible! Investment: about $70.00 USD.

Size of the eggplants: Try to choose medium-large sized eggplants that will give you 11-12 slices each. I generally discard the upper 1-2 slices at the neck of the eggplant if they are too narrow. This recipe allows for 4 servings, which assumes 2 towers per person, with each tower consisting of 3 slices of eggplant (i.e. 6 slices of eggplant per person, 2 towers/person). If you’re serving this as a first dish (but not the main event), I recommend one tower/person.

MY MARINARA SAUCE RECIPE

Making your own marinara is simple and well worth the effort when compared to current store-bought sauces, which, in my opinion, are outrageously overpriced.

HERE’S HOW TO MAKE YOUR OWN MARINARA

Heat the olive oil in a dutch oven or large sauce pot. Then add your diced onions. Season them with a bit of salt. Sauté until onions are translucent, about 2 1/2 minutes. Add your garlic and move it around for about a minute (garlic cooks quickly and you don’t want it to burn it!).

Add ground beef if you’re using ground beef. Cook for about 3 minutes until the beef looks sealed – that is, until outer edges are no longer pink.

Then add the whole tomatoes. Despite other cooks who might recommend rinsing the tin of tomatoes with a bit of water and adding it, I do NOT recommend this. Instead, if you want to thin out your sauce slightly, add a splash of chicken stock (about 2 T). Break up the whole tomatoes with a wooden spoon to desired texture. Personally, I like a rustic sauce, so I go light on the breaking up. Then add your wine. Allow the wine to evaporate and cook down, about 2 minutes. If you like thyme, add a sprig. If you like oregano, add it dried. If you have a parmesan rind, add it in. Give it a stir and leave it to simmer for about 15 minutes on a low heat.

Finally, add the grated parmesan cheese if you haven’t added a parmesan rind earlier. If you have, skip the added grated cheese. (Don’t add the grated cheese earlier, as the flavor will dissipate quickly.) That’s it! Your home-made marinara is ready to use in your grilled eggplant parmesan recipe.